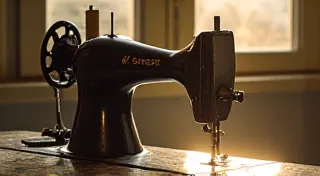
Singer 66-4: Adjusting the Tension for Perfect Stitches
The Singer 66-4 is a workhorse of a vintage sewing machine, renowned for its reliability and versatility. It's a machine that many sewists rely on, and a vital part of a well-equipped sewing room. However, even the most robust machines can sometimes produce uneven stitches due to incorrect thread tension. This guide provides a step-by-step process for adjusting the thread tension on your Singer 66-4 to achieve consistent, beautiful stitches. Proper maintenance, like addressing rust, is also critical for keeping your vintage machine running smoothly. If you're dealing with rust, you might find our article on Dealing with Rust on Antique Singer Sewing Machines helpful.
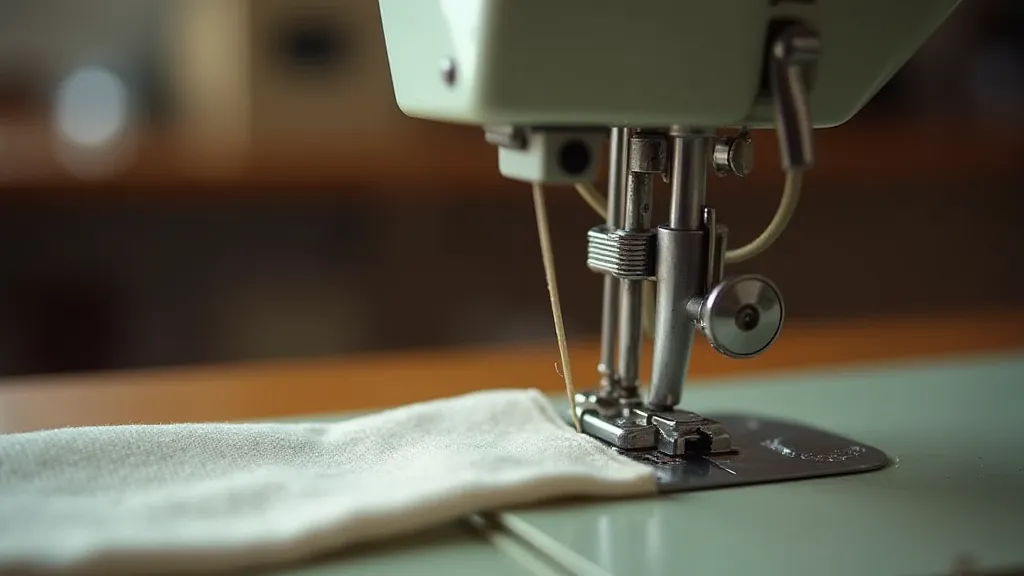
Understanding Thread Tension
Thread tension refers to the tightness of the upper and lower threads as they interlock. If the upper thread is too tight, the stitches will pull on the fabric, creating a puckered appearance. This can also distort the shape of your project, making it difficult to achieve the desired look. Conversely, if the upper thread is too loose, the lower thread will dominate, resulting in looped stitches on the underside of the fabric. Achieving balance is key – a well-balanced stitch is the foundation of quality sewing.
Tools You'll Need
- Your Singer 66-4 Sewing Machine
- Thread (matching your project) - consider the type of thread you're using, as different thread weights and materials will impact the tension.
- Fabric scraps (cotton works well for testing)
- Small screwdriver (often included with your Singer 66-4) - keep this screwdriver safe and secure; it's a small, vital tool.
- Good lighting - this helps to accurately assess stitch quality.
- Magnifying glass (optional) - for examining the stitches closely.
Step-by-Step Tension Adjustment
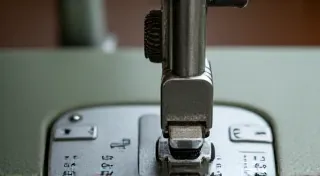
- Prepare Your Machine: Ensure your machine is threaded correctly according to the Singer 66-4 manual. Incorrect threading is a common culprit for tension problems! Double-check each step in the threading process, ensuring the thread is properly seated in all tension discs and guides.
- Initial Test Stitch: Using a scrap of fabric and a simple straight stitch, sew a few inches. Observe the stitch quality. This initial test stitch serves as your baseline for comparison as you make adjustments.
- Assess the Stitch:
- Upper Thread Too Tight: If the stitches look tight and pull on the fabric, the upper thread tension needs to be loosened. This creates a 'pulled' or 'puckered' appearance.
- Upper Thread Too Loose: If the lower thread loops prominently on the underside of the fabric, the upper thread tension needs to be tightened. This is often referred to as "nesting."
- Balanced Stitch: If the stitches look even and balanced on both sides of the fabric, you're all set! This is the ideal outcome – a perfectly balanced stitch.
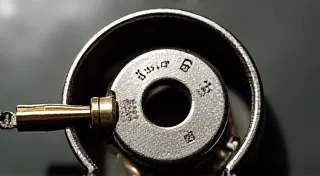
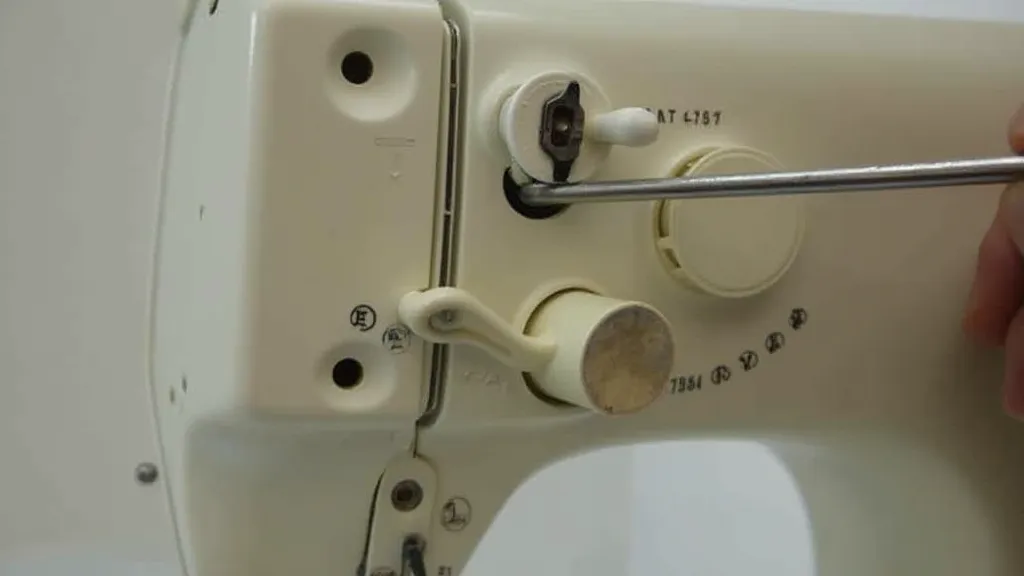
- Adjusting the Upper Tension: The Singer 66-4 has a tension dial (usually marked 0-9). Small adjustments make a big difference. The dial represents a range of tension settings; understanding this range is key to accurate adjustments.
- To loosen the upper thread tension: Rotate the dial to a lower number (e.g., from 5 to 3). Remember to make small adjustments – a difference of just one or two numbers can significantly impact the stitch quality.
- To tighten the upper thread tension: Rotate the dial to a higher number (e.g., from 5 to 7). Document your adjustments—keeping track of what works can be extremely helpful for future reference.
- Re-Test: After each adjustment, sew another test stitch and re-assess the quality. Continue making small adjustments until you achieve a balanced stitch. It's an iterative process – don't be discouraged if it takes several adjustments to find the sweet spot.
- Lower Thread Adjustment (Rarely Needed): The lower thread tension on the Singer 66-4 is typically pre-set and rarely needs adjustment. Attempting to alter it can be complex and is not recommended unless you are a very experienced repair person. Tampering with the lower tension mechanism is best left to professionals, as it can easily damage the machine. If you're looking to improve the overall performance of a similar vintage machine, exploring resources on topics like replacing the drive belt on a Singer 15-91 can be beneficial.
- Final Stitch Test: Once you're satisfied with the upper thread tension, sew a longer seam on your project fabric to ensure the balanced tension holds true throughout your sewing. This final test ensures that the balanced tension you achieved on the test scraps translates to your actual project.
Troubleshooting Common Tension Issues
Beyond the basic adjustment process, several factors can contribute to tension problems. Here's a deeper look at some common issues and how to address them:
- Incorrect Threading: Double-check the threading path *every* time you change thread. Even a slight variation can impact tension.
- Thread Type Mismatch: Are you using a thread weight appropriate for your fabric and project? Heavy thread on lightweight fabric will create tension issues.
- Needle Condition: A dull or damaged needle can cause tension problems. Regularly replace your needles—a good rule of thumb is every 8-10 hours of sewing. Consider looking into Replacing the Singer 15-91 Needle: A Step-by-Step Guide to learn more about needle changes.
- Fabric Type: Different fabrics require different tension settings. A tightly woven fabric like denim will need a slightly different tension than a loosely woven fabric like chiffon.
- Lint Buildup: Lint can accumulate in the tension discs, hindering the smooth passage of thread. Regularly clean the tension discs with a small brush.
- Machine Maintenance: Regular cleaning and oiling of your Singer 66-4 will keep it running smoothly and prevent tension problems.
Advanced Tension Adjustment Tips
Once you're comfortable with the basic tension adjustment process, you can explore these advanced tips:
- Differential Feed: Some vintage machines have a differential feed, which adjusts the feed dog ratio to prevent stretching or puckering. Experiment with the differential feed setting to fine-tune your tension.
- Tension Springs: The tension springs control the pressure on the thread. In rare cases, the springs may be damaged or weakened, requiring replacement. This is a job best left to a qualified repair person.
- Tension Discs: The tension discs are responsible for applying the correct amount of pressure to the thread. If the discs are worn or damaged, they may need to be replaced.
Conclusion
Adjusting the thread tension on your Singer 66-4 can seem daunting at first, but with practice and patience, you'll master the process. Remember to make small adjustments, test frequently, and consult the Singer 66-4 manual for specific instructions. By understanding the principles of thread tension and following these steps, you can achieve beautiful, balanced stitches and enjoy the reliability and versatility of your vintage Singer 66-4 sewing machine. For further insights into the intricacies of vintage machines, consider delving into " Brass Constellations: Mapping the Intricacies of a Singer 201".